Kaki With Ruffle Bodice
Updated: Aug 2, 2023
Adding this ruffle to Kaki gives a little extra delicate touch to her favorite knit dress. She will love this cozy knit and fashionable look!
Shop the Look
Pattern: Kaki, View A
Fabric: Knit Pink Stripe by Art Gallery Fabrics (see other striped knits)
*Available at childrenscornerstore.com while supplies last.
Supplies
Children’s Corner Kaki Knit Fabric Tracing Paper Ruler French curve (optional)
Drafting
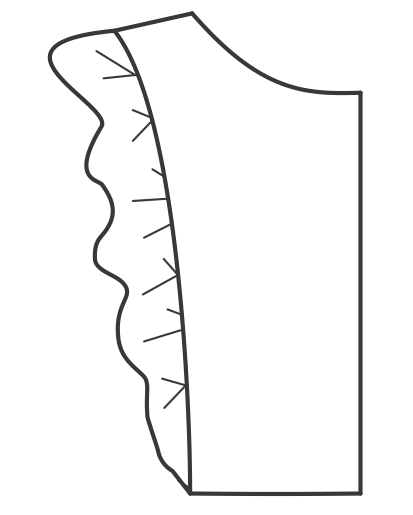
1. Trace the front and back view A Kaki bodice. Shorten the front and back bodices. (1" – sizes 6mo–5; 1 1⁄2" – sizes 6–14) Measure the front and back shoulders and mark the centers. Now measure the bottom of the front and back bodices. Measure from the center front to the side seam and mark the half-way point on each. Repeat with the back.

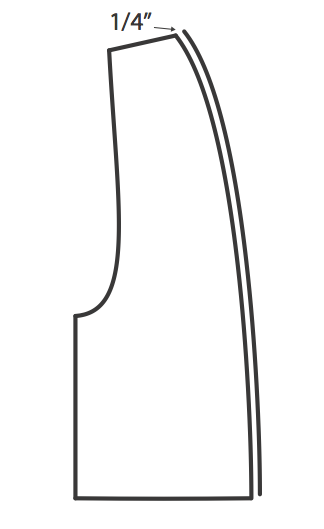
2. Connect these two marks at the shoulder and bottom of the bodices. Use a French curve ruler so that you can start with a slight curve at the shoulder. And end with a straight line at the bottom mark. Repeat with the back.

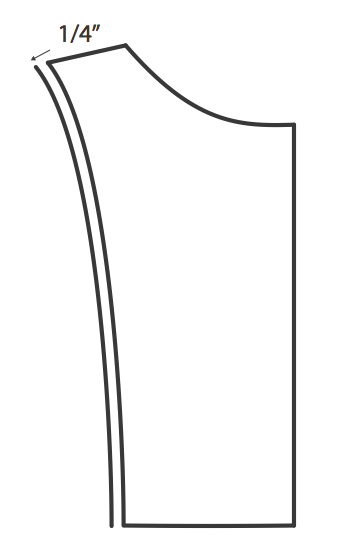
3. Now retrace the front and back once more adding a 1⁄4” seam allowance to the new lines. You will now have 4 bodice pieces. (a center front, side front, center back and side back) Be sure to label these pattern pieces.


4. Measure the front length of the new seam lines. Multiply that number by 1.5 and that will be the length of the ruffle pattern.

5. Make a ruffle pattern. The top will be the widest point, and ease down to 1/2" for all sizes. The width of the ruffle should be: 2” for sizes 6mo–18mo, 2 1⁄2” for sizes 24mo–5 , 3” for sizes 6–14.

Cutting Instructions
6. Use the Kaki view A sleeve, adding 1 1⁄2” to the length of the sleeve.
7. Add 1" to 1 1/2” to the length of the Kaki View B skirt pattern.
Cutting Hints If your knit stretches vertically and horizontally you can be very creative with the way you cut the pattern pieces. This is fun when the fabric is a stripe. If you notice that the fabric curls on the edges you can cut the ruffles on the bias and the edges will lay flat. Finishing Ruffle Either cut on bias or finish the ruffle edge with a serger rolled hem. If the fabric doesn’t seem to curl, cut nice clean edges with a rotary cutter and leave them unfinished.
Construction
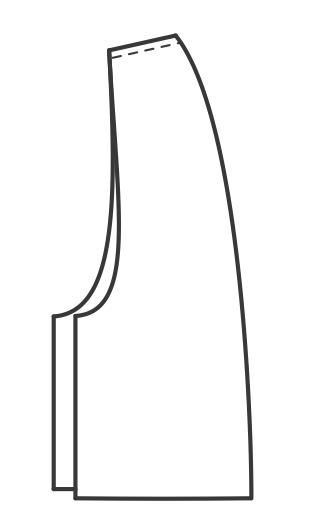
8. Stitch the shoulder seams of the front and back side panels with right sides together. Finish the seam allowance. Repeat with the center panel.


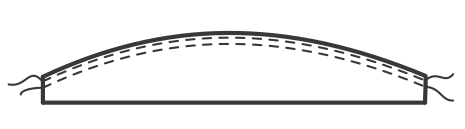
9. Stitch 2 rows of lengthened stitches along the curved edges of the ruffles. Use a 3.5 mm stitch length. Gather to fit the edge of the center front and back bodice. Stitch in place with the right sides together.

10. Stitch the side panel to the center panel with right sides together and ruffle sandwiched in between. Repeat with other side. Finish the seam allowance.

11. Refer to the Kaki instructions. Instead of stitching the cuff on the sleeve, finish the edge with a 1” hem and stitch using a twin needle. For a sundress neckline, press the neck edge to the inside 1/4” and top stitch in place.
Adaptation by
Susan Whitman


Click the printer icon below for printable version.